Linux System Customization
Applicability
Ubuntu18.04 For other versions of Ubuntu, this can be used as a reference.
1.Modifying the rootfs Partition
If a larger rootfs partition is needed, other partitions must be deleted to free up space, such as the userdata partition space.
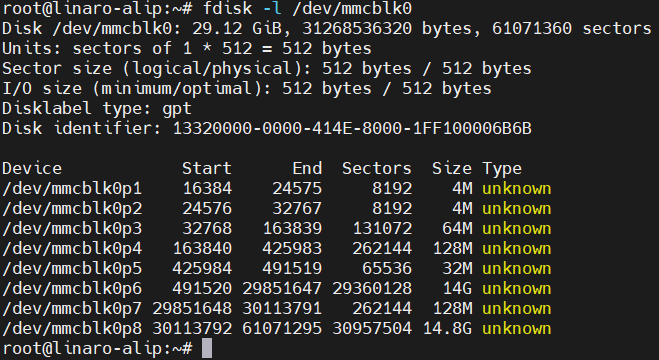
1.1.Viewing the Entire eMMC Partition Situation
fdisk -l /dev/mmcblk0
1.2.Unmounting the Mounted Partitions userdata and oem
umount /userdata
umount /oem
1.3.Deleting userdata and oem Partitions
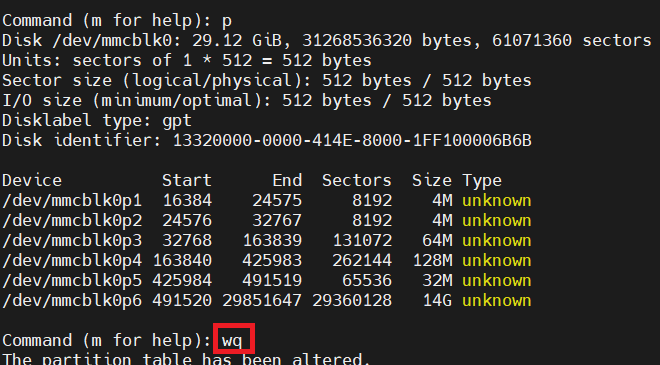
fdisk /dev/mmcblk0
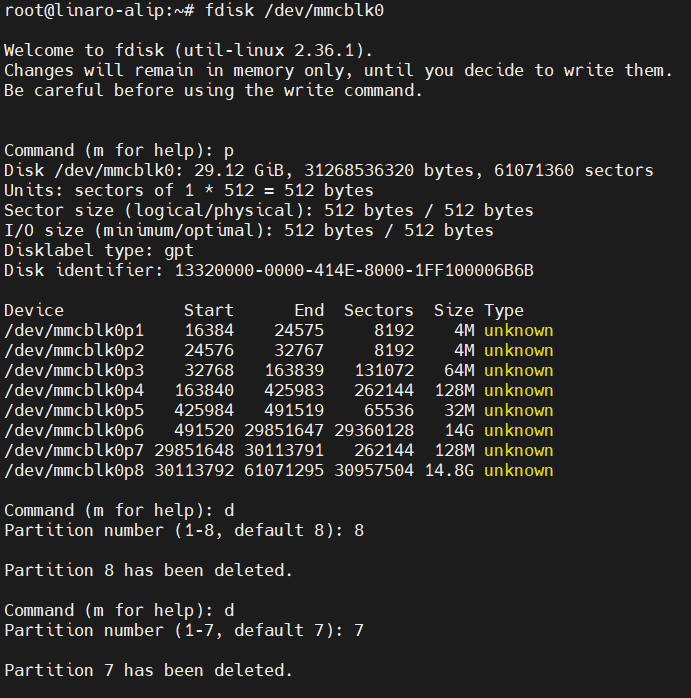
Enter the ‘wq’ command to delete the partition
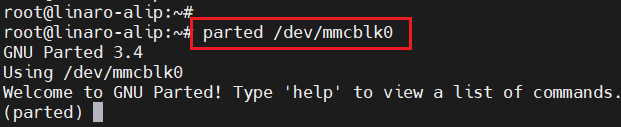
1.4.Adjusting the Size of the rootfs Partition
parted /dev/mmcblk0
Parted partition
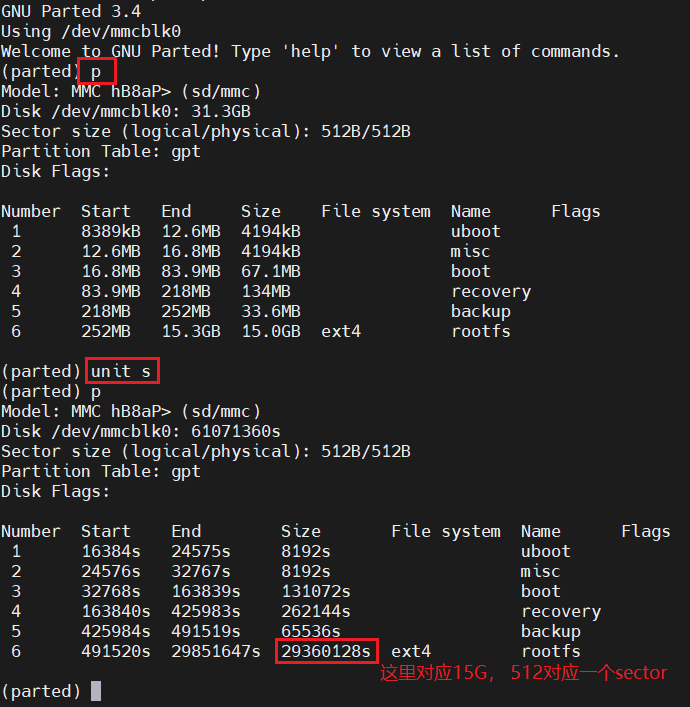
15G corresponds to 29360128 sectors
Adjusting the size of rootfs

Exit
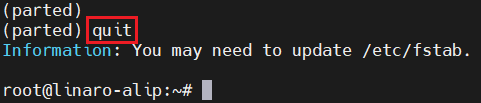
1.5.Activating the rootfs Partition
resize2fs /dev/mmcblk0p6
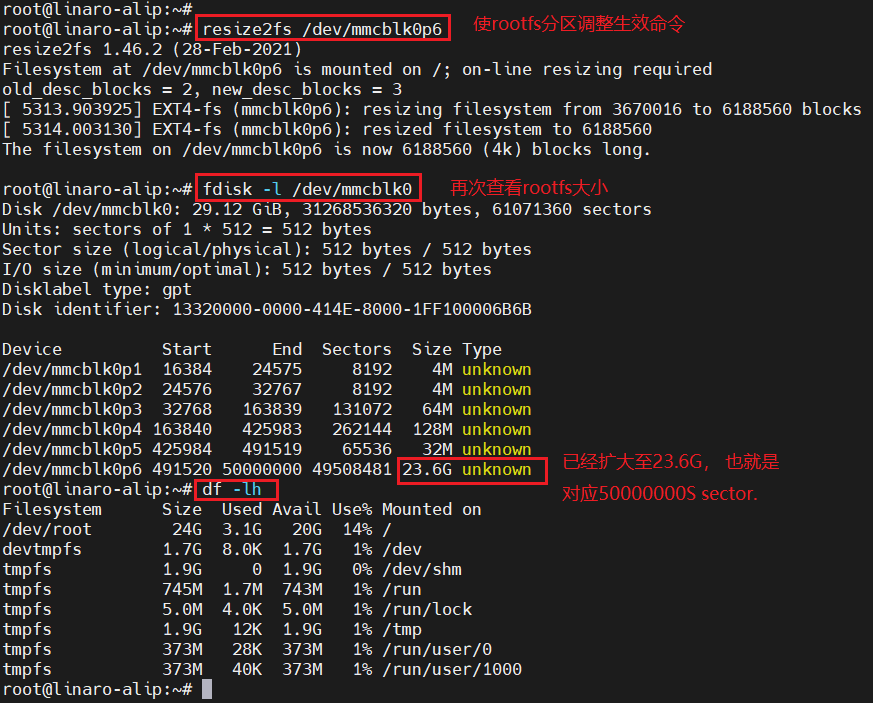
rootfs adjustment completed
2.Enabling systemd in buildroot
2.1.Clearing the Cache
First, clear the cache generated by previous buildroot compilations (note: clearing the cache will result in longer compilation times), as follows:

2.2.Selecting Configuration
Select the Neardi development board configuration, as follows choose BoardConfig-rk3588-neardi-linux-lc160.mk

2.3.Configuring systemd
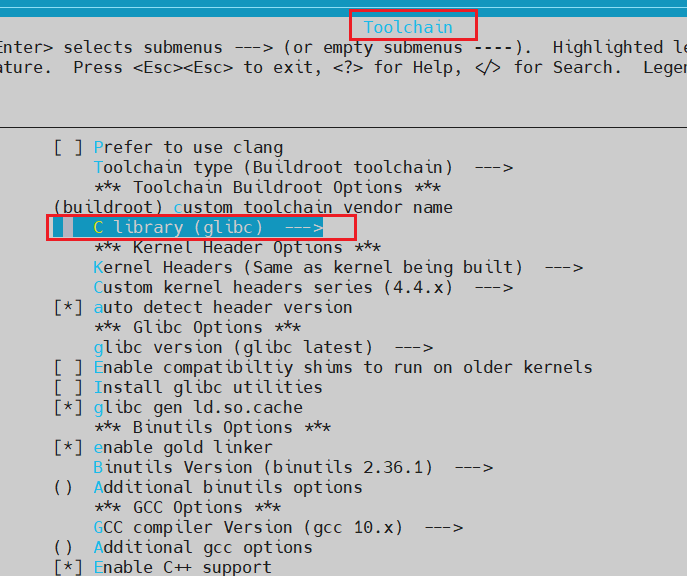
Enter the buildroot directory (cd buildroot), execute the ARCH=arm64 make menuconfigcommand, inToolChain–>select glibc,as follows:
Then select System Configuration->Init system->systemd, as follows:
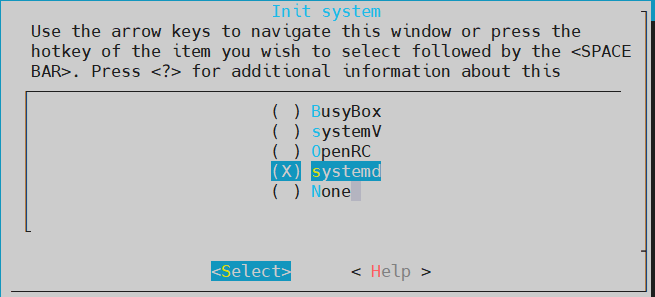
Afterward, save and exit.
2.4.Saving the Configuration
ARCH=arm64 make savedefconfig
2.5.Checking if the Configuration is Effective
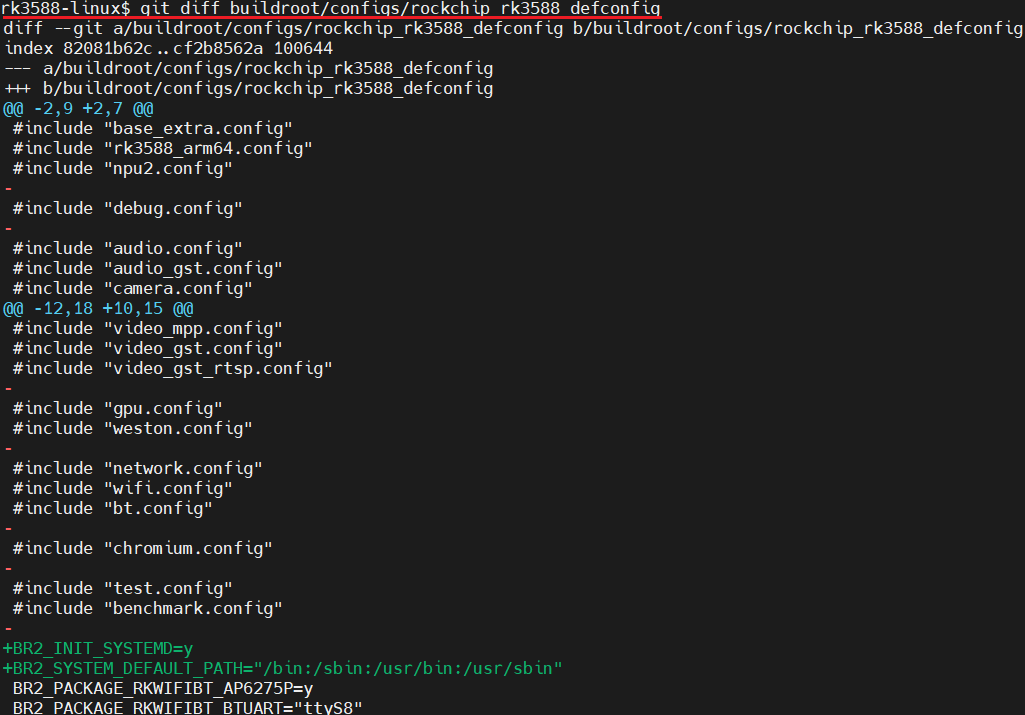
The above image shows systemd saved to the SDK configuration file: buildroot/configs/rockchip_rk3588_defconfig
2.6.Compiling the Firmware
./build.sh
After successful compilation, the following files are generated:
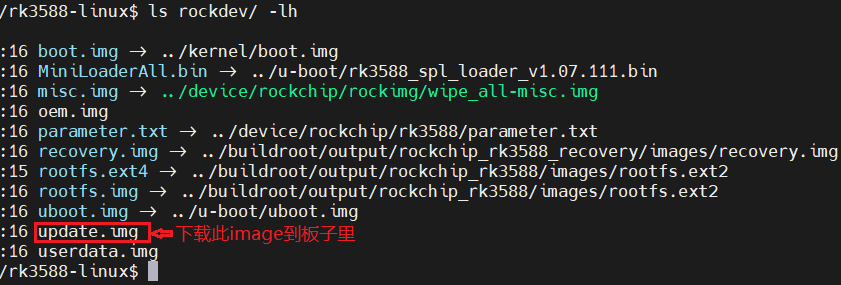
Use the rockchip download tool to burn the update.img to the development board.
2.7.Verifying if systemd is Working
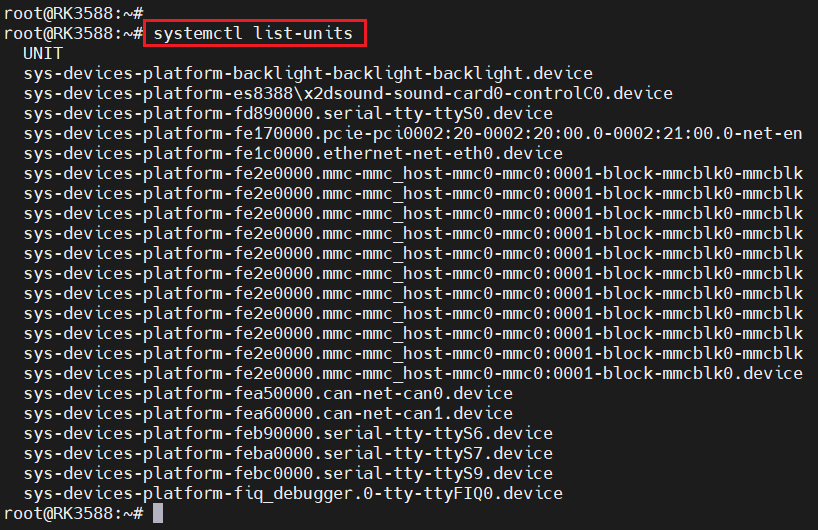
The above image shows systemd running successfully.