Linux系统定制

适用范围

  • Ubuntu18.04 对于其他 Ubuntu 的版本,可供参考。
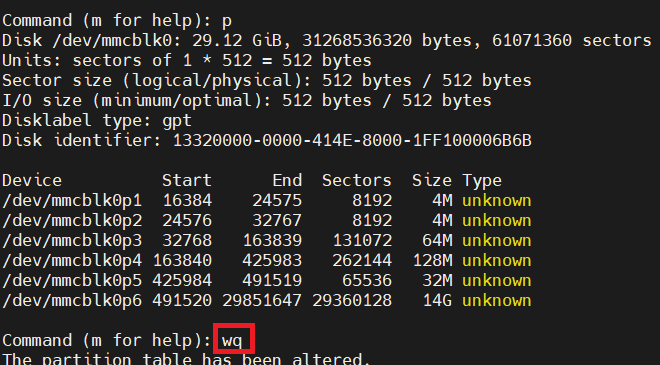
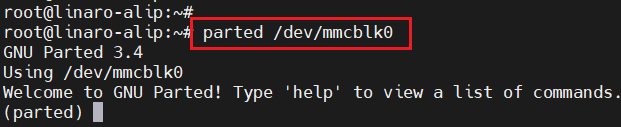
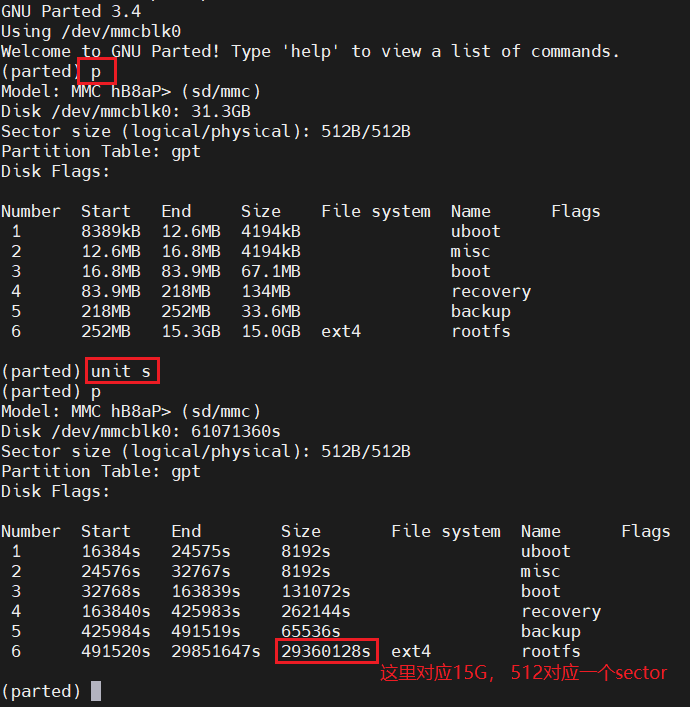
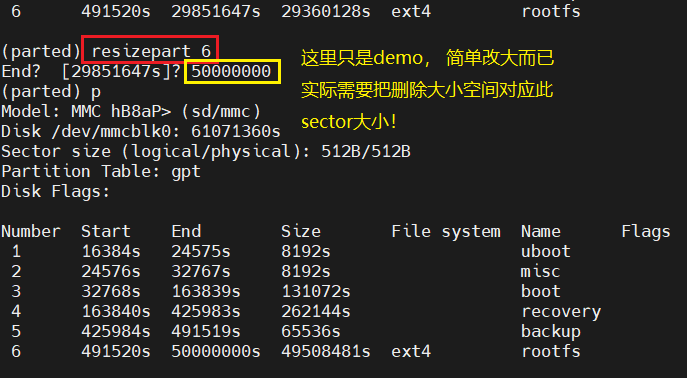
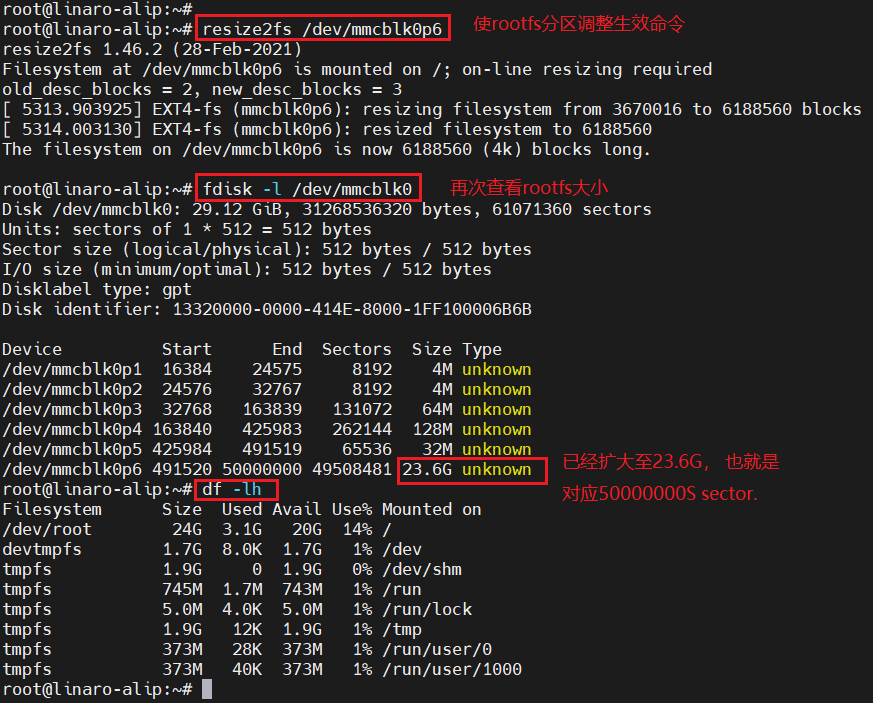
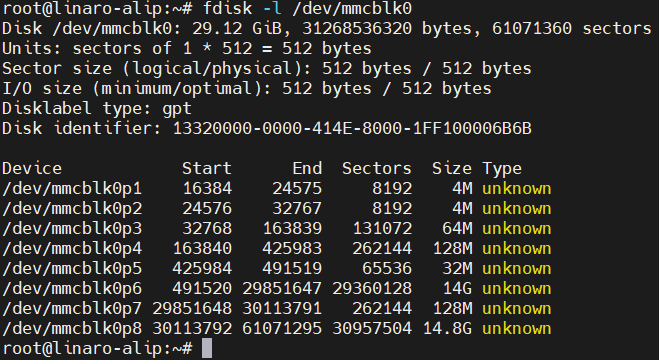
1.修改rootfs分区

若需要rootfs分区更大, 则需要把其它分区删除以便有空余的空间, 比如userdata分区的空间。

1.1.查看整个eMMC分区情况

fdisk -l /dev/mmcblk0

../_images/ubuntu_custom_rootfs_1.png

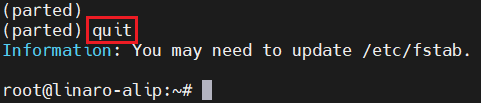
1.2.卸载已挂载的分区userdata及oem分区

umount /userdata
umount /oem

1.3.删除userdata及oem分区

fdisk /dev/mmcblk0

../_images/ubuntu_custom_rootfs_2.png

删除分区里输入wq命令

../_images/ubuntu_custom_rootfs_3.png

1.4.调整rootfs分区大小

parted /dev/mmcblk0

../_images/ubuntu_custom_rootfs_4.png

parted分区

../_images/ubuntu_custom_rootfs_5.png

15G  对应的sector个数是29360128s

调整rootfs大小

../_images/ubuntu_custom_rootfs_6.png

退出

../_images/ubuntu_custom_rootfs_7.png

1.5.使rootfs分区生效

resize2fs /dev/mmcblk0p6

../_images/ubuntu_custom_rootfs_8.png

rootfs调整完成

2.buildroot中启用systemd

2.1.清除缓存

先清除之前编译buildroot所产生的缓存(注意:清除后再编译时间会较长), 如下命令:

../_images/ubuntu_custom_buildroot_systemd1.png

2.2.选择配置

选择Neardi的开发板配置, 如下选择BoardConfig-rk3588-neardi-linux-lc160.mk

../_images/ubuntu_custom_buildroot_systemd2.png

2.3.配置systemd

进入buildroot目录(cd buildroot), 执行ARCH=arm64 make menuconfig命令, 在ToolChain–>选择glibc,如下:

../_images/ubuntu_custom_buildroot_systemd3.png

再选择System Configuration->Init system->systemd, 如下:

../_images/ubuntu_custom_buildroot_systemd4.png

之后保存退出。

2.4.保存配置

ARCH=arm64 make savedefconfig

2.5.检查配置是否生效

../_images/ubuntu_custom_buildroot_systemd5.png

上图显示保存systemd至SDK配置文件中: buildroot/configs/rockchip_rk3588_defconfig

2.6.编译固件

./build.sh

编译成功后, 生成如下文件:

../_images/ubuntu_custom_buildroot_systemd6.png

使用rockchip下载工具, 把update.img烧录到开发板。

2.7.验证systemd是否工作

../_images/ubuntu_custom_buildroot_systemd7.png

上图成功运行systemd