System Debugging
Serial Port Debugging
If you are involved in U-Boot or kernel development, a USB serial adapter (short for USB to serial TTL adapter) is very useful for checking system boot logs, especially when there is no graphical desktop display.
Choosing an Adapter
There are many USB to serial adapters available online. By chip type, the following serial ports are recommended:
| Serial Port | Maximum Baud Rate | Recommended | Review | Purchase Link |
|---|---|---|---|---|
| CP2102 | 2Mbps | Recommended | Supports high baud rate communication, good stability and durability |
Note: The default baud rate for LKD3588 is 1500000. Some USB to serial chips may not reach a baud rate of 1500000, and there may be differences between different series of the same chip, so make sure to confirm support before purchasing.
Hardware Connection
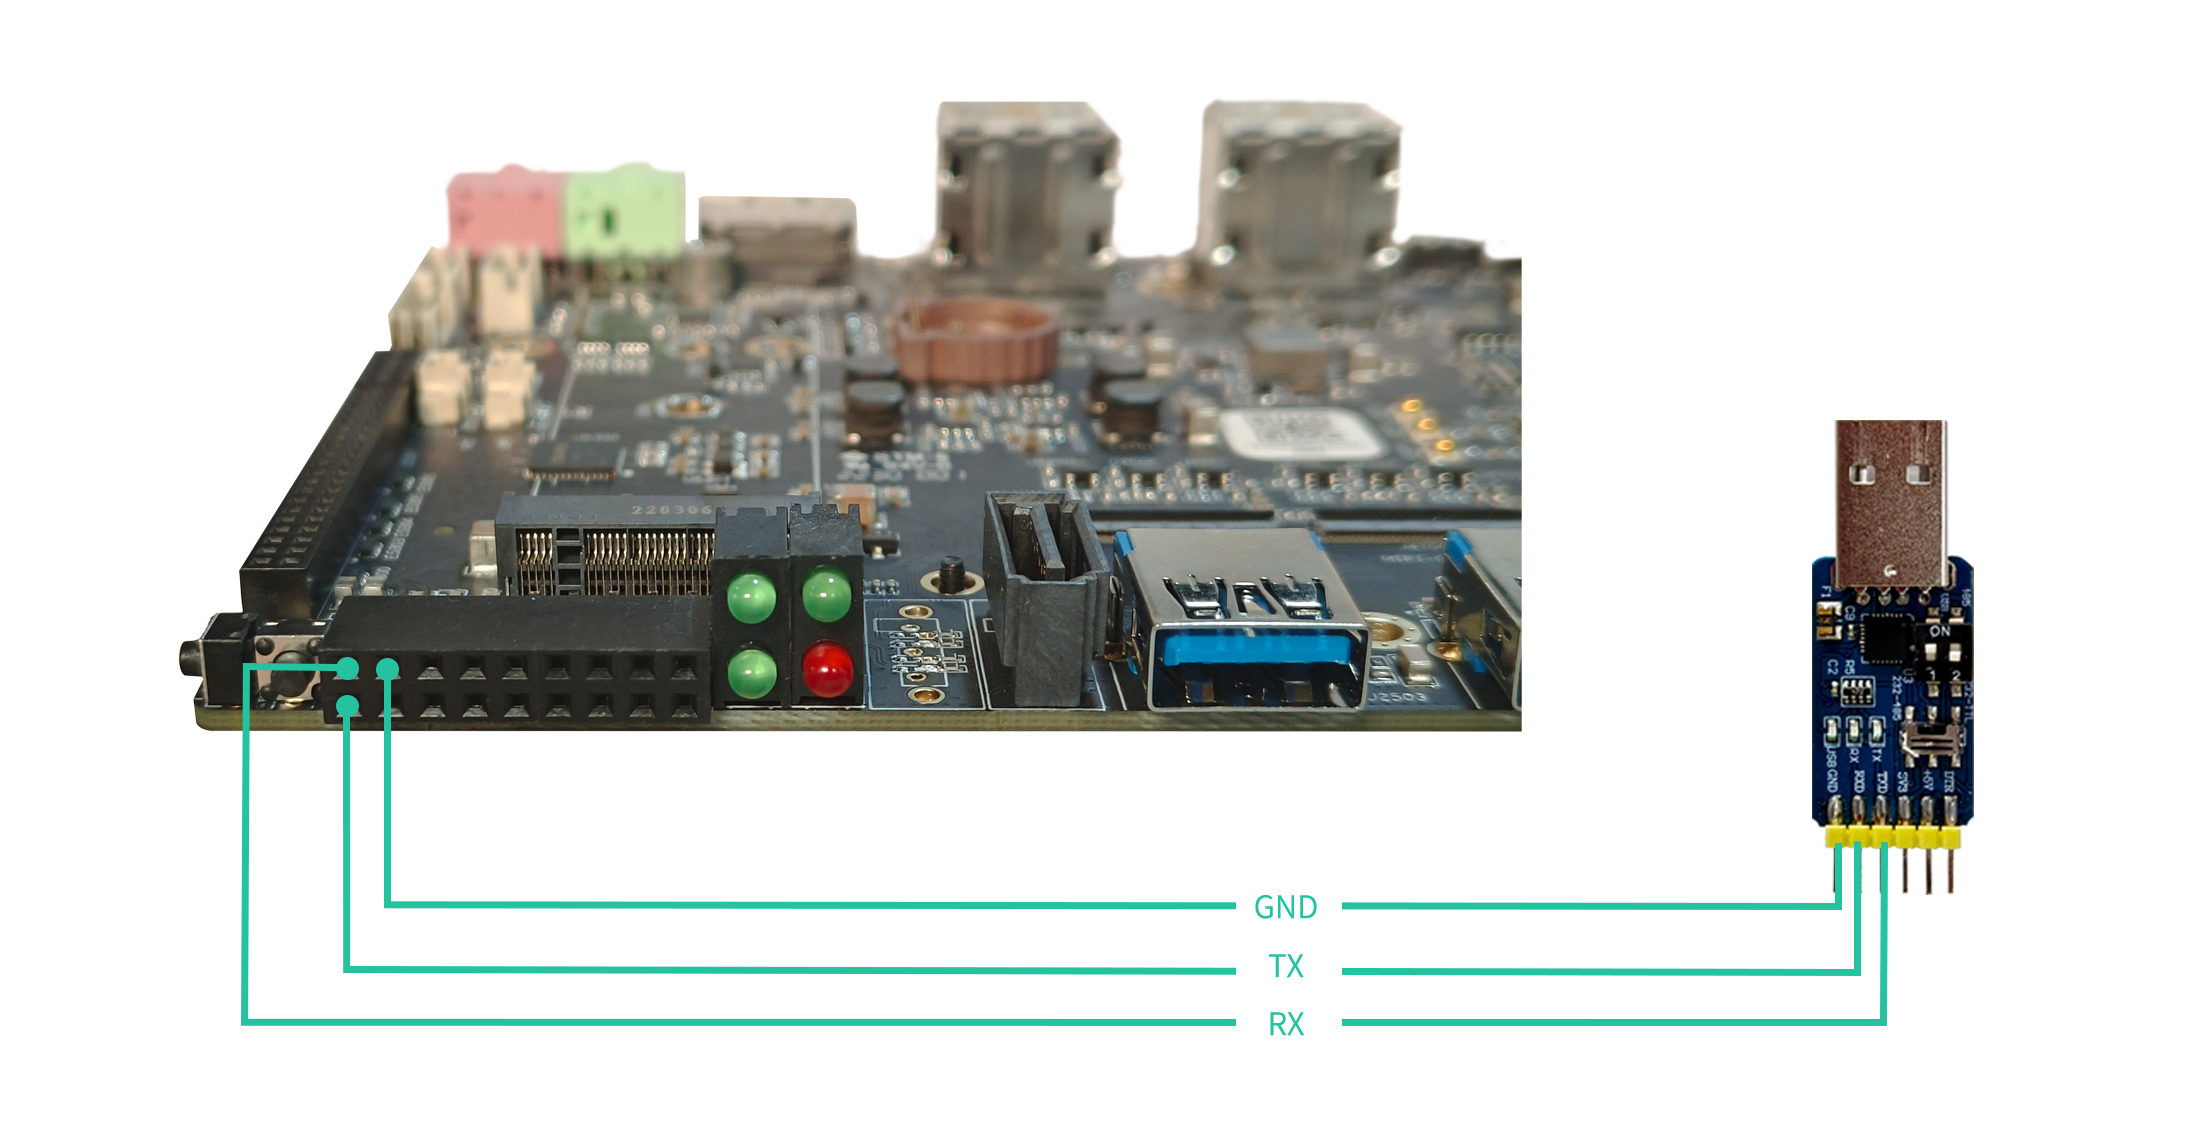
The USB to serial adapter has four pins:
3.3V power (NC), no connection needed
GND, the ground wire of the serial port, connected to the GND pin of the development board’s serial port
TXD, the output wire of the serial port, connected to the TX pin of the development board’s serial port
RXD, the input wire of the serial port, connected to the RX pin of the development board’s serial port
Note: If you encounter problems with TX and RX input and output using other serial adapters, try swapping the TX and RX connections.
LKD3588 serial port connection diagram:
Windows Serial Port Tools
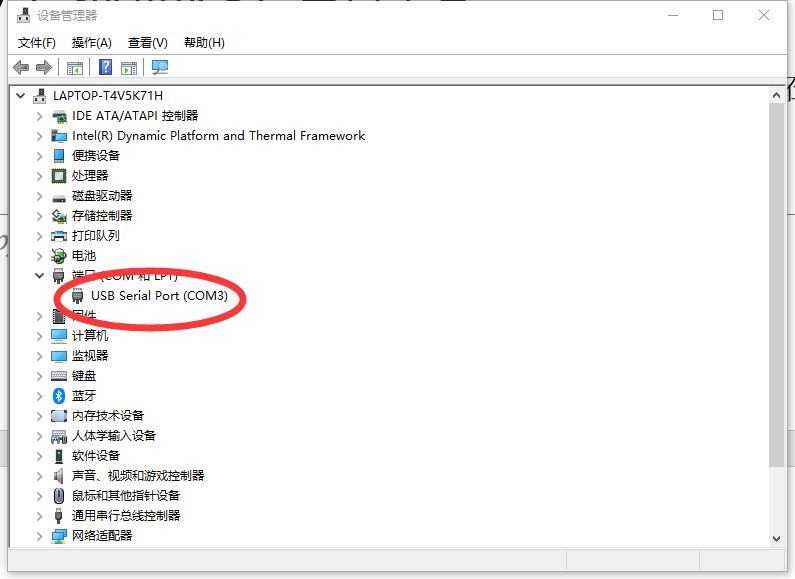
1、Connect the Debug port of the development board to the USB port of the PC, open the Device Manager to get the USB Serial Port number, as shown in the following figure:
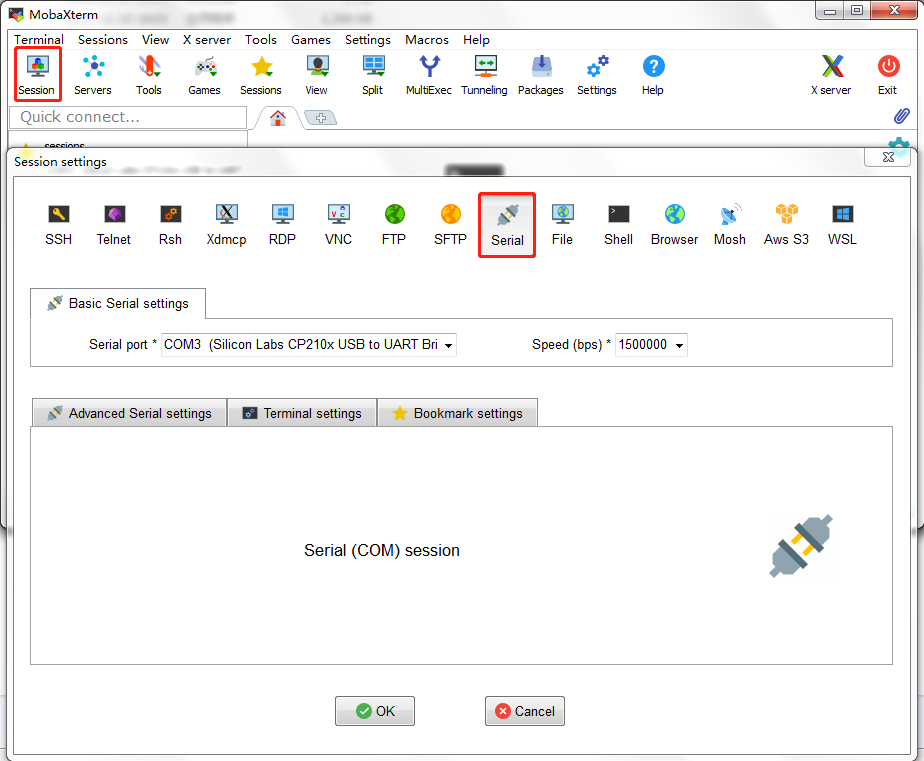
2、Install MobaXterm Serial Port Tool
3、Click session and select Serial。
4、Change Serial port to the COM port obtained from the Device Manager.
5、Change Speed (bsp) to 1500000。
6、 Click the OK button.
Linux Serial Port Tools
1、Install minicom: sudo apt-get install minicom。
2、Connect the Debug port of the development board to the USB port of the host.
3、Open minicom with root privileges:: sudo minicom -s。
4、Open the Minicom menu:Enter CTRL-A + z。
5、Enter the Minicom configuration interface: Enter “O” to select “Configure Minicom”.
6、Enter serial port settings: Select “Serial port setup”.
7、Set the serial port device: Enter “A”, write “/dev/ttyUSB0”, and press Enter to confirm.
8、Disable flow control: Enter “F” and press Enter to confirm.
9、Set the baud rate: Enter “E”, then enter “A” until “Current 1500000 8N1” is displayed, then press Enter to confirm.
10、Save the settings: Select “Save setup as dfl”.
11、Exit the settings: Select “Exit”.
adb debugging
Introduction to Adb
Adb is short for Android Debug Bridge, which is Android’s command-line debugging tool. It can perform various functions, such as tracking system logs, uploading and downloading files, installing applications, etc.
Installing Adb on Windows
Install USB Driver DriverAssitant_v5.12。
Download adb tools, extract adb.exe, AdbWinApi.dll, and AdbWinUsbApi.dll, and copy each one to the
C:\Windows\System32andC:\Windows\SysWOW64directories.
Open a cmd window and run:
adb shell
If successful, you will enter the adb shell.
Installing Adb on Ubuntu
Install the adb tool:
sudo apt-get install android-tools-adb
Add the device ID:
mkdir -p ~/.android
vi ~/.android/adb_usb.ini
# add the following line:
0x2207
Add udev rules for non-root users:
sudo vi /etc/udev/rules.d/51-android.rules
# add the following line:
SUBSYSTEM=="usb", ATTR{idVendor}=="2207", MODE="0666"
Reload udev rules:
sudo udevadm control --reload-rules
sudo udevadm trigger
Restart adb as a normal user:
sudo adb kill-server
adb start-server
Then you can directly use adb, such as:
adb shell
Common Adb Commands
Connection Management
List all connected devices and their serial numbers:
adb devices
If there are multiple connected devices, you must distinguish them by serial number:
export ANDROID_SERIAL=<device serial number>
adb shell ls
You can also connect Adb over TCP/IP network:
adb tcpip 5555
Adb will restart on the device and listen on TCP port 5555, at which point you can unplug the USB cable.
If the device’s IP address is 192.168.1.100, execute the following command to connect:
adb connect 192.168.1.100:5555
Once connected, you can execute adb commands:
adb shell ps
adb logcat
Until you disconnect the adb connection:
adb disconnect 192.168.1.100:5555
Debugging
Query System Logs
Usage:
adb logcat [option] [Application label]
Example:
# View all logs
adb logcat

# View only part of the logs
adb logcat -s WifiStateMachine StateMachine
Collect Bug Reports
adb bugreport is used to collect error reports and some system information.
adb bugreport

# Save locally for easy editing and viewing
adb bugreport >bugreport.txt
Run shell
Open an interactive shell:
adb shell
Execute shell commands:
adb shell ps
Apk Management
Install Apk
adb install [option] example.apk

Options:
-l Forward lock
-r Reinstall the application while preserving the original data
-s Install to SD card instead of internal storage
Example:
# Install facebook.apk
adb install facebook.apk

# Upgrade twitter.apk
adb install -r twitter.apk
If the installation fails, check for common reasons:
INSTALL_FAILED_ALREADY_EXISTS: Try adding the-rparameter and reinstalling.INSTALL_FAILED_SIGNATURE_ERROR: APK signatures are inconsistent, which may be due to differences between signatures and debug versions. If you confirm that the APK file signature is normal, you can use theadb uninstallcommand to uninstall the old application and then reinstall it.INSTALL_FAILED_INSUFFICIENT_STORAGE: Not enough storage space.
Uninstall Apk
adb uninstall apk_name
Example:
adb uninstall com.android.chrome
The names of apk packages can be listed with the following command:
adb shell pm list packages -f
...
package:/system/app/Bluetooth.apk=com.android.bluetooth
...