Firmware Upgrade Using Type-C Cable
Introduction
This article describes how to burn firmware from a host computer to the LPA3588 development board’s memory using a Type-C data cable. When upgrading, it is necessary to choose the appropriate upgrade method based on the host operating system and firmware type.
Preparation Tools
LPA3588
Host computer
Good quality Type-C data cable
Prepare Firmware
Firmware can be obtained by compiling the SDK or downloaded from LPA3588 . There are generally two types of firmware files:
Unified Firmware
Unified firmware is a single file that packages all files such as partition table, bootloader, uboot, kernel, system, etc. Neardi’s officially released firmware uses the unified firmware format. Upgrading with unified firmware will update all partition data and the partition table on the motherboard and erase all data on the motherboard.
Multiple Partition Images
These are independent files for each function, such as partition table, bootloader, kernel, etc., generated during the development stage. Independent partition images can update a specified partition while keeping the data in other partitions intact, which is convenient for debugging during development.
With the unified firmware unpacking/packing tool, you can unpack a unified firmware into multiple partition images or combine multiple partition images into one unified firmware.
Install Burning Tool
Windows Operating System
Install RK USB Driver Download and unzip Release_DriverAssistant.zip, then run the DriverInstall.exe inside. To ensure all devices use the updated driver, first select
Uninstall Driver, thenInstall Driver.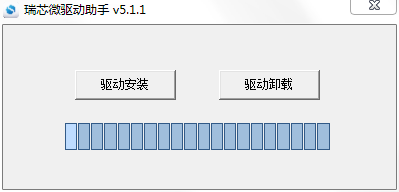
Download and unzip RKDevTool_Release_v2.96,and run RKDevTool.exeinside the RKDevTool_Release_v2.96 directory(note, if it’s Windows 7/8, right-click and choose to run as administrator).
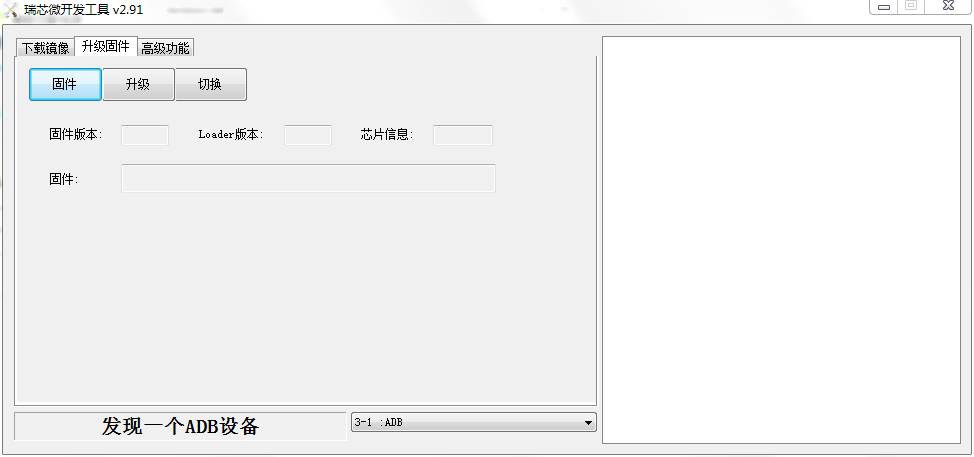
Linux Operating System
No device driver installation is required under Linux.
** Linux_Upgrade_Tool Download Linux_Upgrade_Tool and install it into the system for easy access:
unzip Linux_Upgrade_Tool_xxxx.zip
cd Linux_UpgradeTool_xxxx
sudo mv upgrade_tool /usr/local/bin
sudo chown root:root /usr/local/bin/upgrade_tool
sudo chmod a+x /usr/local/bin/upgrade_tool
Linux_adb_fastboot Download Linux_adb_fastboot and install it into the system for easy access:
sudo mv adb /usr/local/bin
sudo chown root:root /usr/local/bin/adb
sudo chmod a+x /usr/local/bin/adb
sudo mv fastboot /usr/local/bin
sudo chown root:root /usr/local/bin/fastboot
sudo chmod a+x /usr/local/bin/fastboot
Enter Upgrade Mode
There are usually two modes for firmware upgrade: Loader mode and MaskRom mode. Before burning the firmware, we need to connect the device and put the board into an upgradable mode.
Loader Mode
Entering Loader Mode via Hardware
To enter Loader upgrade mode by connecting the device and using the Update button, follow these steps:
Disconnect the power adapter first.
Connect one end of the Type-C data cable to the host and the other end to the development board.
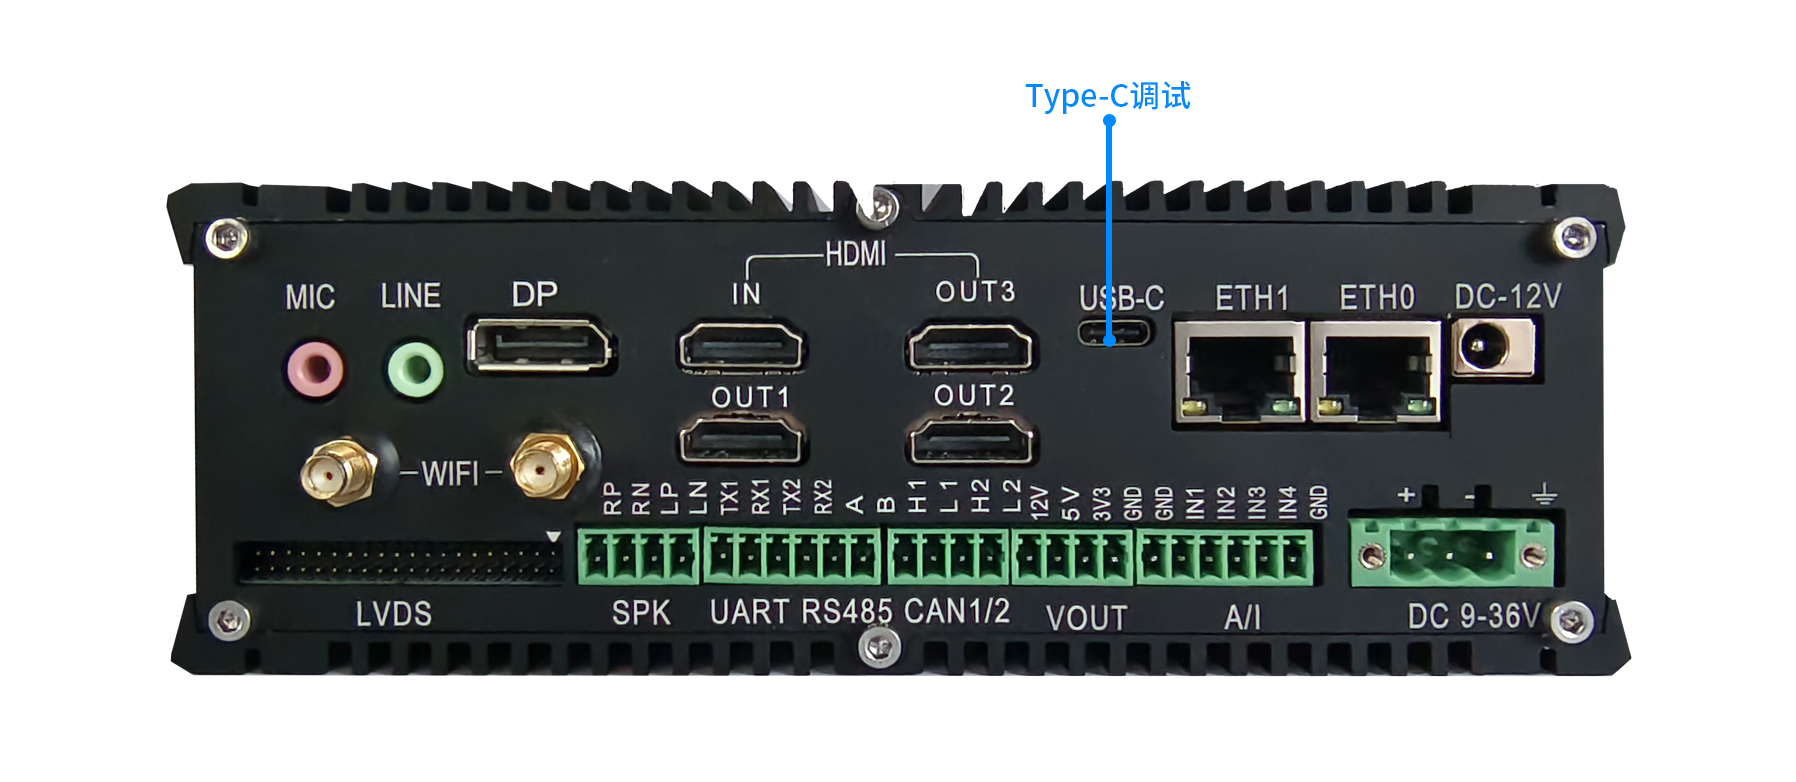
Hold down the Update (Recovery) button on the device and keep it pressed.

Connect the power.
Release the Update button after about two seconds.
Entering Loader Mode via Software
After connecting the Type-C data cable, run the following command on the serial port debugging terminal or adb shell to the board:
reboot loader
Check Loader Mode
To confirm whether the board has entered Loader mode, we can check with a tool.
Windows Operating System
The AndroidTool tool will show a prompt at the bottom saying Found one LOADER device
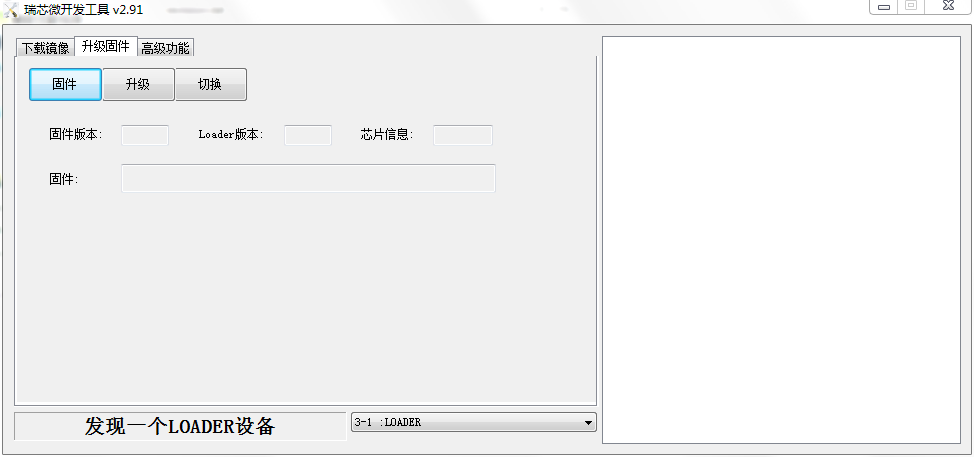
If you have performed the “Enter Loader Mode” operation and still do not see the burning tool prompt LOADER, you can check if the Windows host has a prompt for new hardware and configure the driver. Open Device Manager, and you will see a new device RockusbDevice appear. If not, go back to the previous step and [reinstall the driver].
Linux Operating System
Running upgrade_tool will show a Loader prompt when connected to the device:
neardi@T-chip:~/$ sudo upgrade_tool
List of rockusb connected
DevNo=1 Vid=0x2207,Pid=0x330c,LocationID=106    Loader
Found 1 rockusb,Select input DevNo,Rescan press <R>,Quit press <Q>:q
MaskRom Mode
For how to enter MaskRom mode, please refer to [MaskRom Mode].
Burn Firmware
Windows Operating System
Burning Unified Firmware update.img
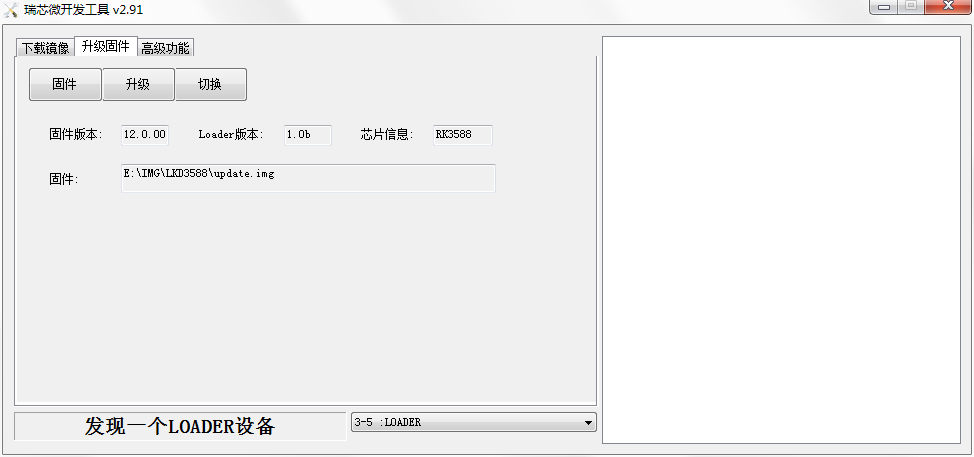
The steps for burning the unified firmware update.img are as follows:
Switch to the
Upgrade Firmwarepage.Press the
Firmwarebutton to open the firmware file to be upgraded. The upgrade tool will display detailed firmware information.Press the
Upgradebutton to start the upgrade.If the upgrade fails, you can try pressing the
Erase Flashbutton to erase the Flash, then upgrade again. Note: If the firmware loader version you are burning is inconsistent with the original machine, please performErase Flashbefore upgrading the firmware.
Burning Partition Images
When the burning tool prompts Found one LOADER device, pressing the Device Partition Table button on the right will display the partition address of the image, as shown in the picture below:
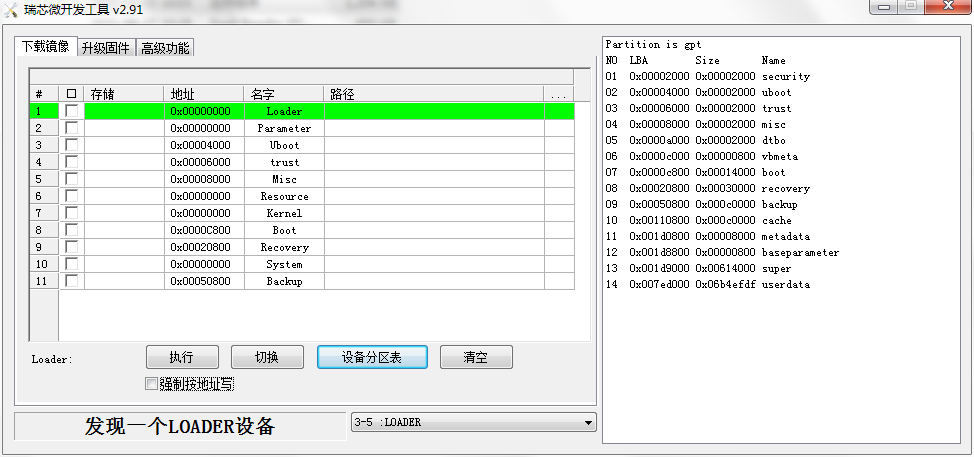
Android Partition Table
| NO | LBA | Size | Name |
|---|---|---|---|
| 01 | 0x00002000 | 0x00002000 | security |
| 02 | 0x00004000 | 0x00002000 | uboot |
| 03 | 0x00006000 | 0x00002000 | trust |
| 04 | 0x00008000 | 0x00002000 | misc |
| 05 | 0x0000a000 | 0x00002000 | dtbo |
| 06 | 0x0000c000 | 0x00000800 | vbmeta |
| 07 | 0x0000c800 | 0x00014000 | boot |
| 08 | 0x00020800 | 0x00030000 | recovery |
| 09 | 0x00050800 | 0x000c0000 | backup |
| 10 | 0x00110800 | 0x000c0000 | cache |
| 11 | 0x001d0800 | 0x00008000 | metadata |
| 12 | 0x001d8800 | 0x00000800 | baseparameter |
| 13 | 0x001d9000 | 0x00614000 | super |
| 14 | 0x007ed000 | 0x06b4efdf | userdata |
Ubuntu Partition Table
Source code corresponding partition table file: device/rockchip/rk3588/parameter.txt
| NO | LBA | Size | Name |
|---|---|---|---|
| 01 | 0x00004000 | 0x00002000 | uboot |
| 02 | 0x00006000 | 0x00002000 | misc |
| 03 | 0x0000c800 | 0x00014000 | boot |
| 04 | 0x00028000 | 0x00040000 | recovery |
| 05 | 0x00068000 | 0x00010000 | backup |
| 06 | 0x00078000 | 0x01c00000 | rootfs |
| 07 | 0x01c78000 | 0x00040000 | oem |
| 08 | 0x001d8800 | 0x00000800 | baseparameter |
| 09 | 0x001d9000 | 0x00614000 | super |
| 10 | 0x01cb8000 | 0x06b4efdf | userdata |
The steps for burning partition images are as follows:
Switch the burning tool to the
Download Imagepage.Click the
Device Partition Tablebutton to refresh the partition address.Check the partitions that need to be burned; multiple selections are possible.
Ensure the path of the image file is correct. If necessary, click the blank table cell next to the path to reselect.
Click the
Upgradebutton to start the upgrade; the device will automatically restart after the upgrade is completed.
Linux Operating System
Burning Unified Firmware update.img
sudo upgrade_tool uf update.img
If the upgrade fails, you can try erasing and then upgrading again.
# To erase flash using the ef parameter, you need to specify the loader file or the corresponding update.img
sudo upgrade_tool ef update.img   #update.img :the Ubuntu firmware you need to burn
# Re-burn
sudo upgrade_tool uf update.img
Burning Partition Images
sudo upgrade_tool di -b /path/to/boot.img
sudo upgrade_tool di -r /path/to/recovery.img
sudo upgrade_tool di -m /path/to/misc.img
sudo upgrade_tool di -u /path/to/uboot.img
sudo upgrade_tool di -dtbo /path/to/dtbo.img
sudo upgrade_tool di -p paramater   #Burn parameter
sudo upgrade_tool ul bootloader.bin # Burn bootloader
If there are flash issues causing errors during the upgrade, you can try low-level formatting and erasing emmc:
sudo upgrade_tool lf update.img  # Low-level format
sudo upgrade_tool ef update.img  # Erase
Fastboot burning dynamic partitions:
adb reboot fastboot # Enter bootloader
sudo fastboot flash vendor vendor.img
sudo fastboot flash system system.img
sudo fastboot reboot # Restart after successful burning
Common Issues
How to Force Enter MaskRom Mode
If the board cannot enter Loader mode, you can try to forcibly enter MaskRom mode.
Analysis of Burning Failure
If there is a Download Boot Fail during the burning process, or if there are errors during the burning process, as shown below, it is usually due to poor USB cable connection, inferior cable material, or insufficient driving capability of the computer’s USB port. Please replace the USB cable or the computer’s USB port for troubleshooting.