Create Rootfs Root File System and Flash
Preparation
16G USB drive or SSD
Ubuntu, Debian system
Format the USB Drive
If the USB drive is ext4, skip the formatting steps.
Insert the USB drive, open the terminal, and enter the
sudo fdisk -lcommand to find the device name of the USB drive, generally /dev/sdb1 or /dev/sdc1, etc.Enter the
sudo umount /dev/sdb1command (assuming the USB drive is /dev/sdb1) to unmount the USB drive partition.Enter the
sudo mkfs.ext4 /dev/sdb1command to format the USB drive partition to ext4 format.Create a new directory using
sudo mkdir /backupcommand.Replug the USB drive, or enter the
sudo mount /dev/sdb1 /backupcommand (assuming the mount point is /backup) to mount the USB drive partition.
Install rsync Tool
sudo apt update
sudo apt install rsync
Execute the Creation Script
The Rootfs creation script backup_fs.sh can be obtained from the neardi network disk.
After obtaining the script, start creating:
#Copy the script to /mnt directory
cp backup_fs.sh /backup
cd /backup
chmod +x backup_fs.sh

#Create (execute as a normal user, not root)
./backup_fs.sh ./
The result after execution is as follows:
neardi@LPA3588:/mnt$ sudo ./backup_fs.sh ./
MEDIA FREE SPACE SIZE    11059   MBytes
EXPORT IMAGE SIZE    3230    MBytes
BLOCK_COUNT 3356968
INODE_COUNT 270952
sync...

sync finish
sync…: indicates it is being created, generally within half an hour. sync finish: creation is complete, the generated rootfs is in /backup/Neardi_rootfs.img.
Obtain the Rootfs Image
Windows
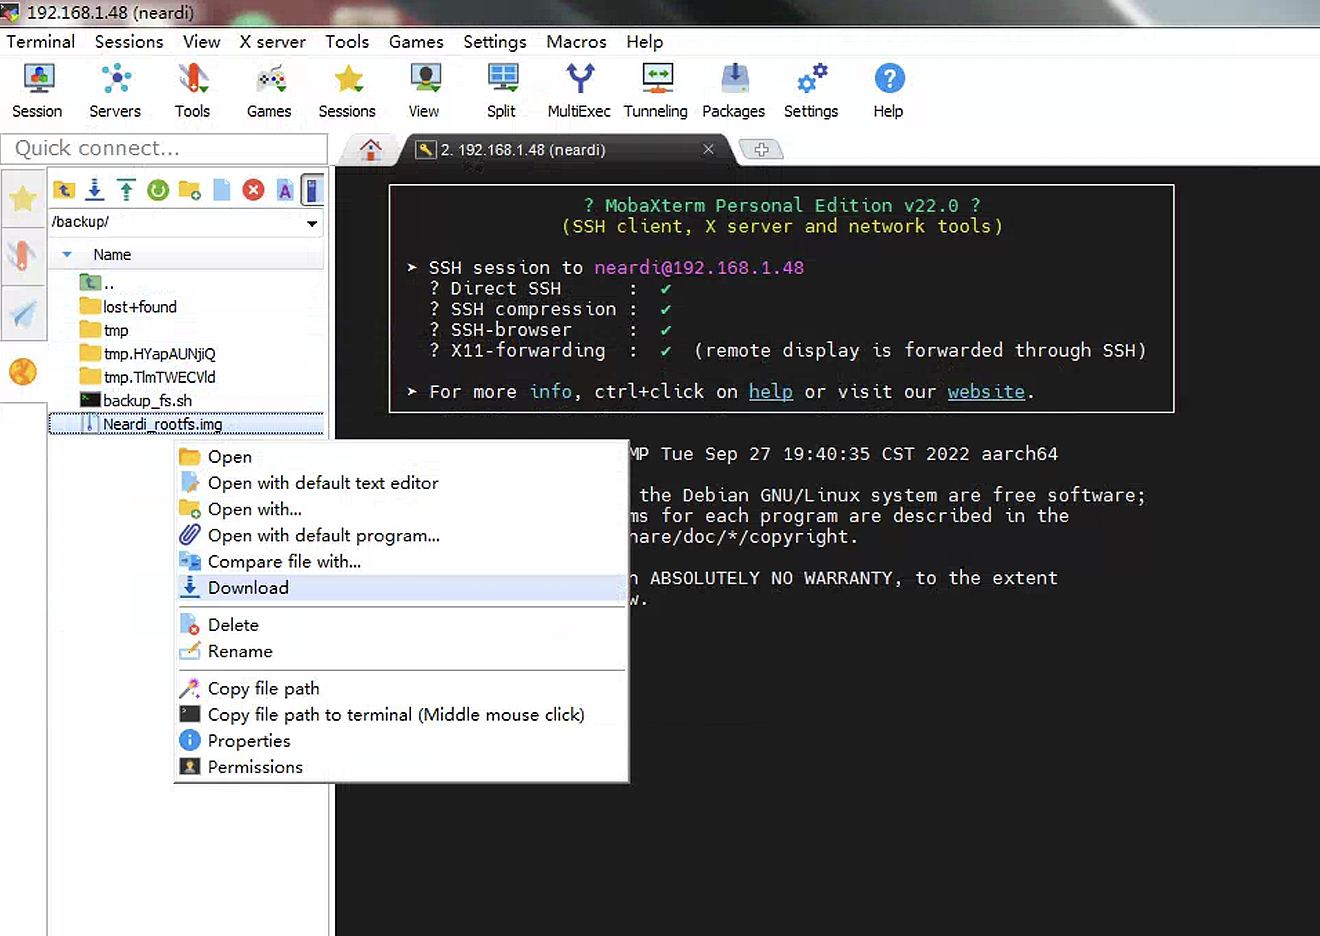
Windows does not recognize ext4 format by default, download MobaXterm, click Session, and after ssh login,enter the /backup folder.
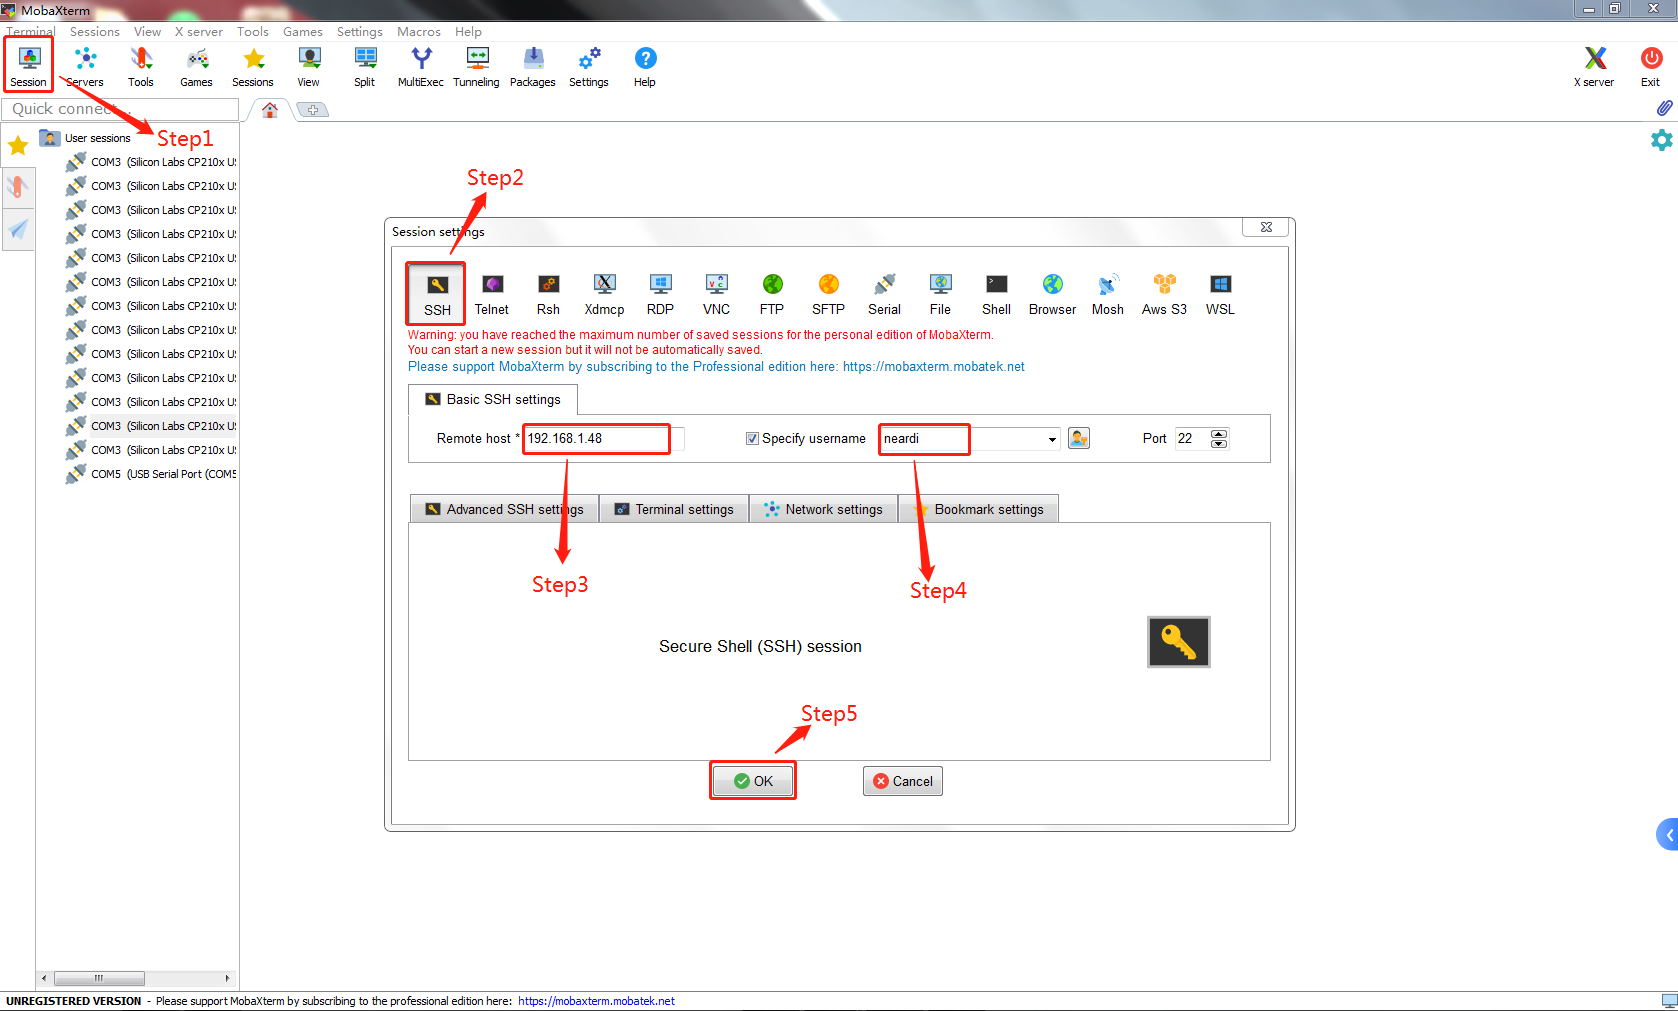
Right-click on Neardi_rootfs.img, and click Download
Ubuntu
Directly copy from the USB drive or SSD.
Flash the Rootfs Partition Separately
Flash the Partition Image
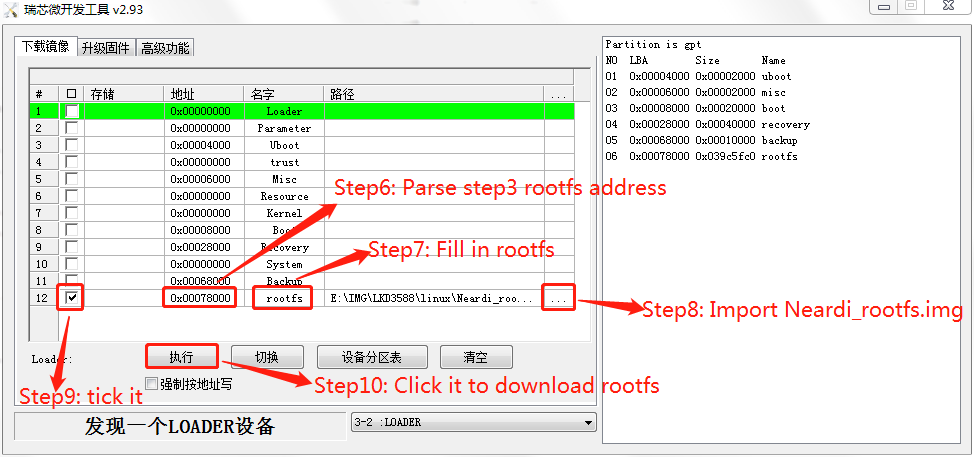
When the motherboard terminal executes sudo reboot loader, the flashing tool will prompt A LOADER device found, Table button Device Partition and the partition rootfs address of the image will be displayed right, as shown in the image below:

Right-click on the blank area at the bottom and click Add Item, as shown in the image below:
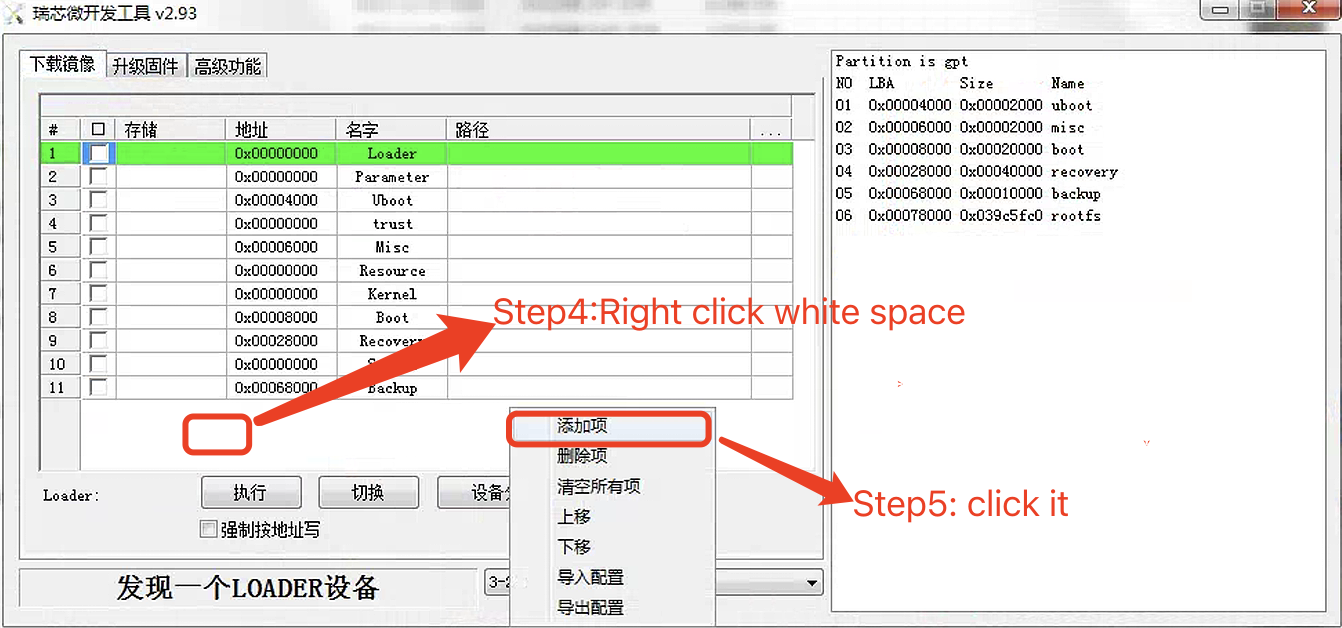
Copy the rootfs address obtained in step three into the address field, name it rootfs, click ... to import Neardi_rootfs.img, check the box for flashing, and finally click Execute, as shown in the image below:
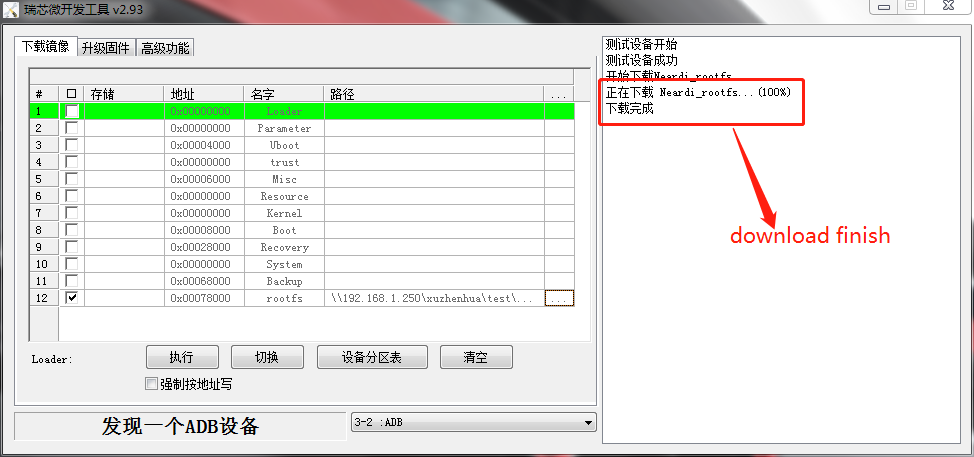
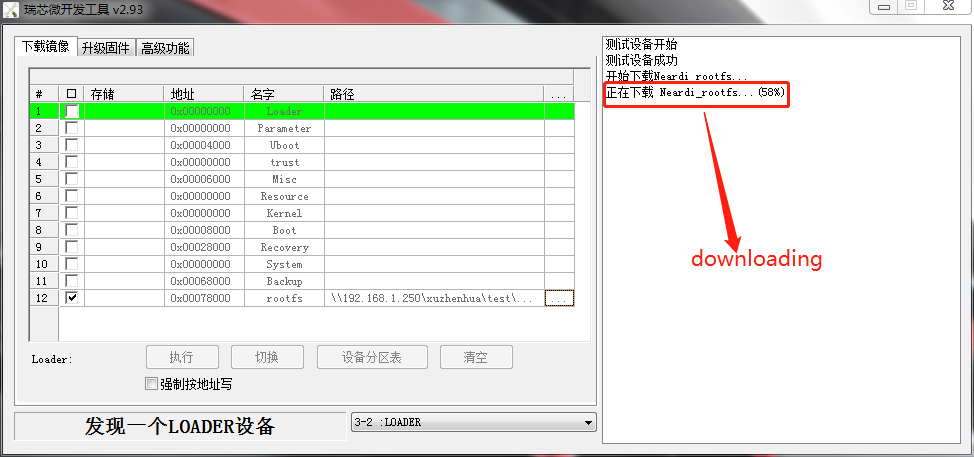
During the flashing process, as shown in the image below:
Flashing complete, as shown in the image below: