UART
Introduction
The Neardi-3568 supports RS232 and RS485 interfaces:
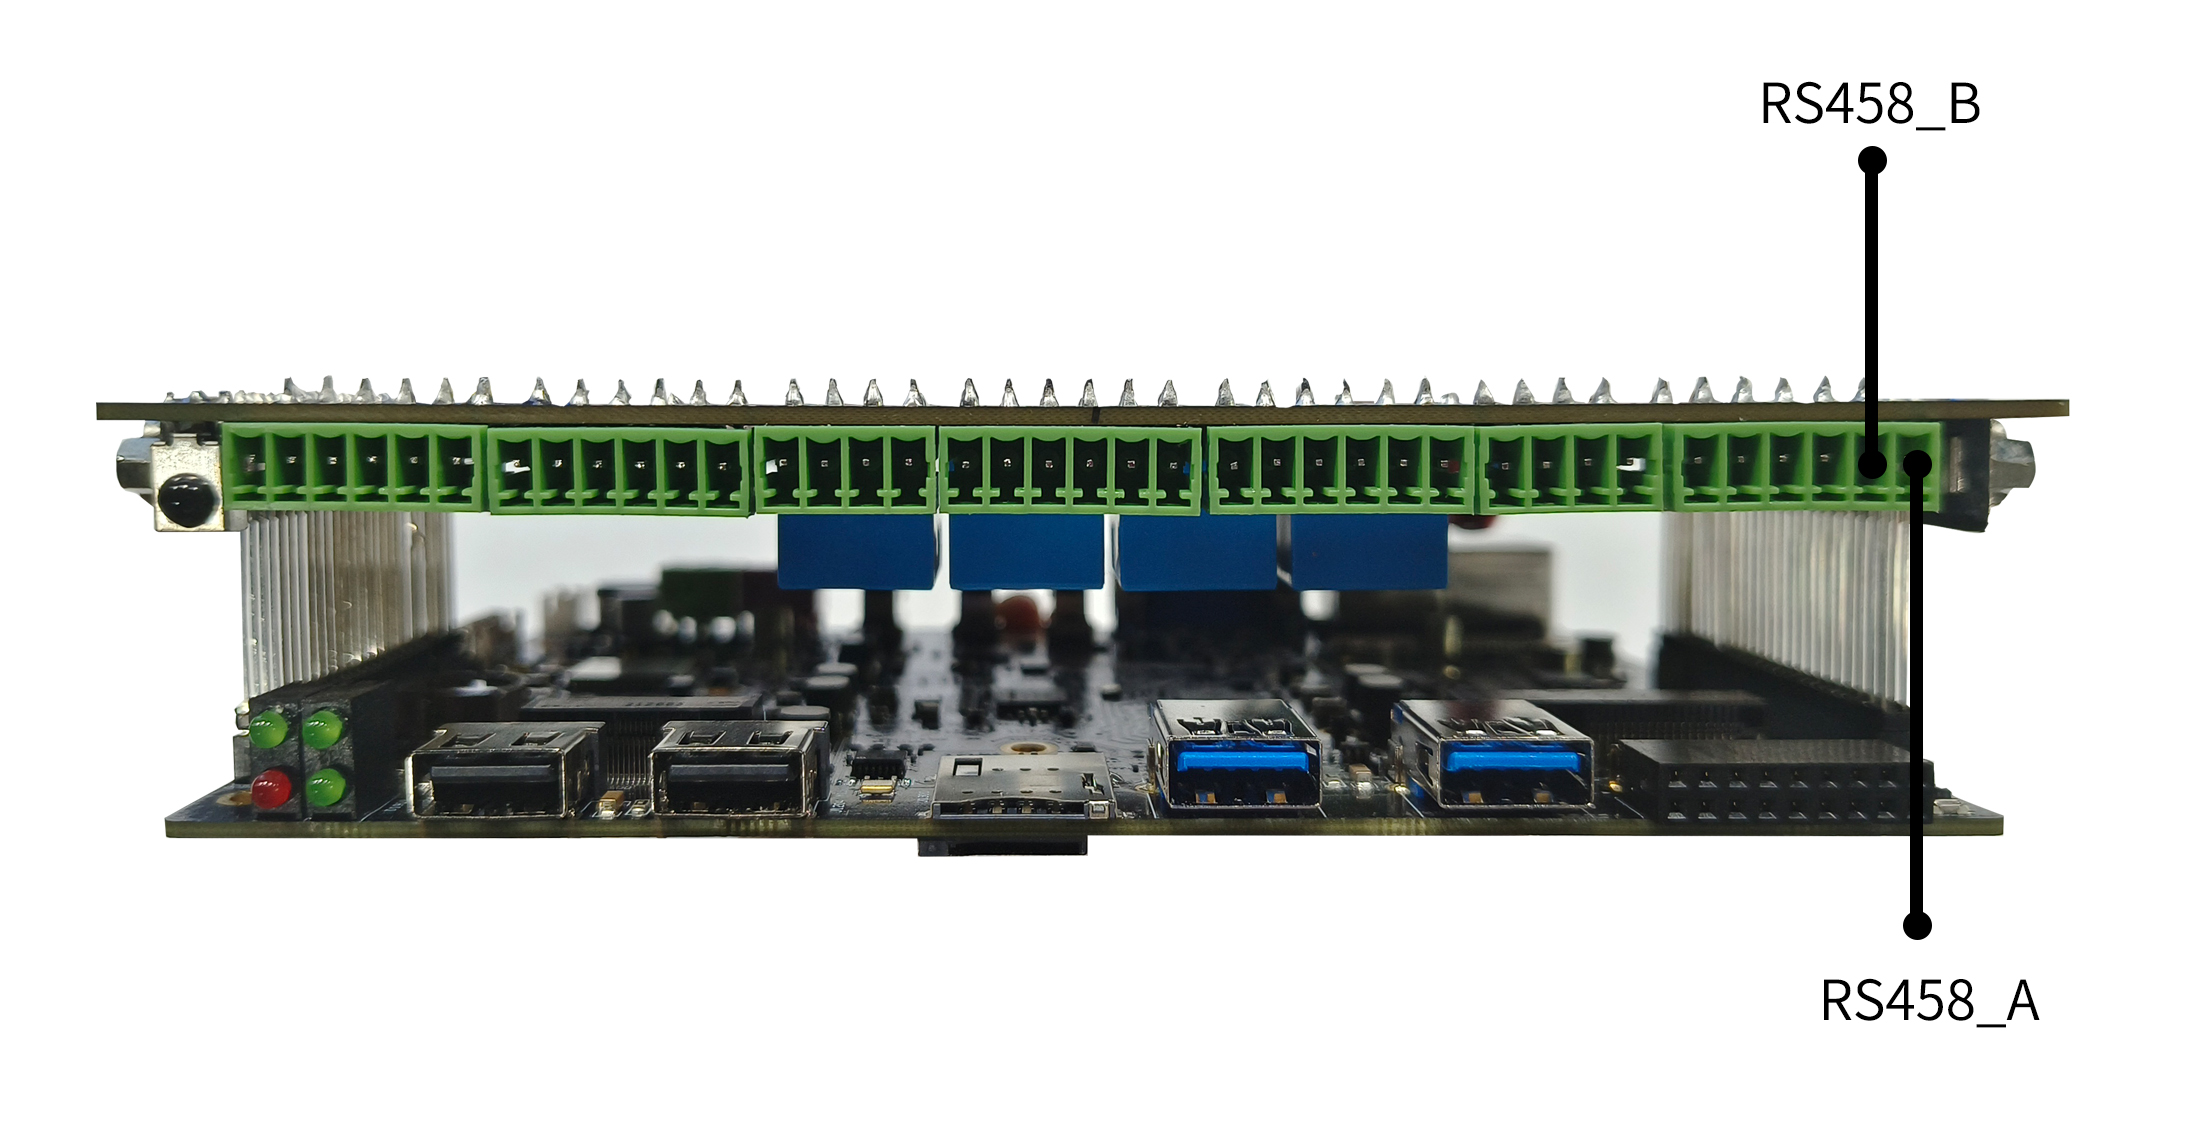
RS485x1
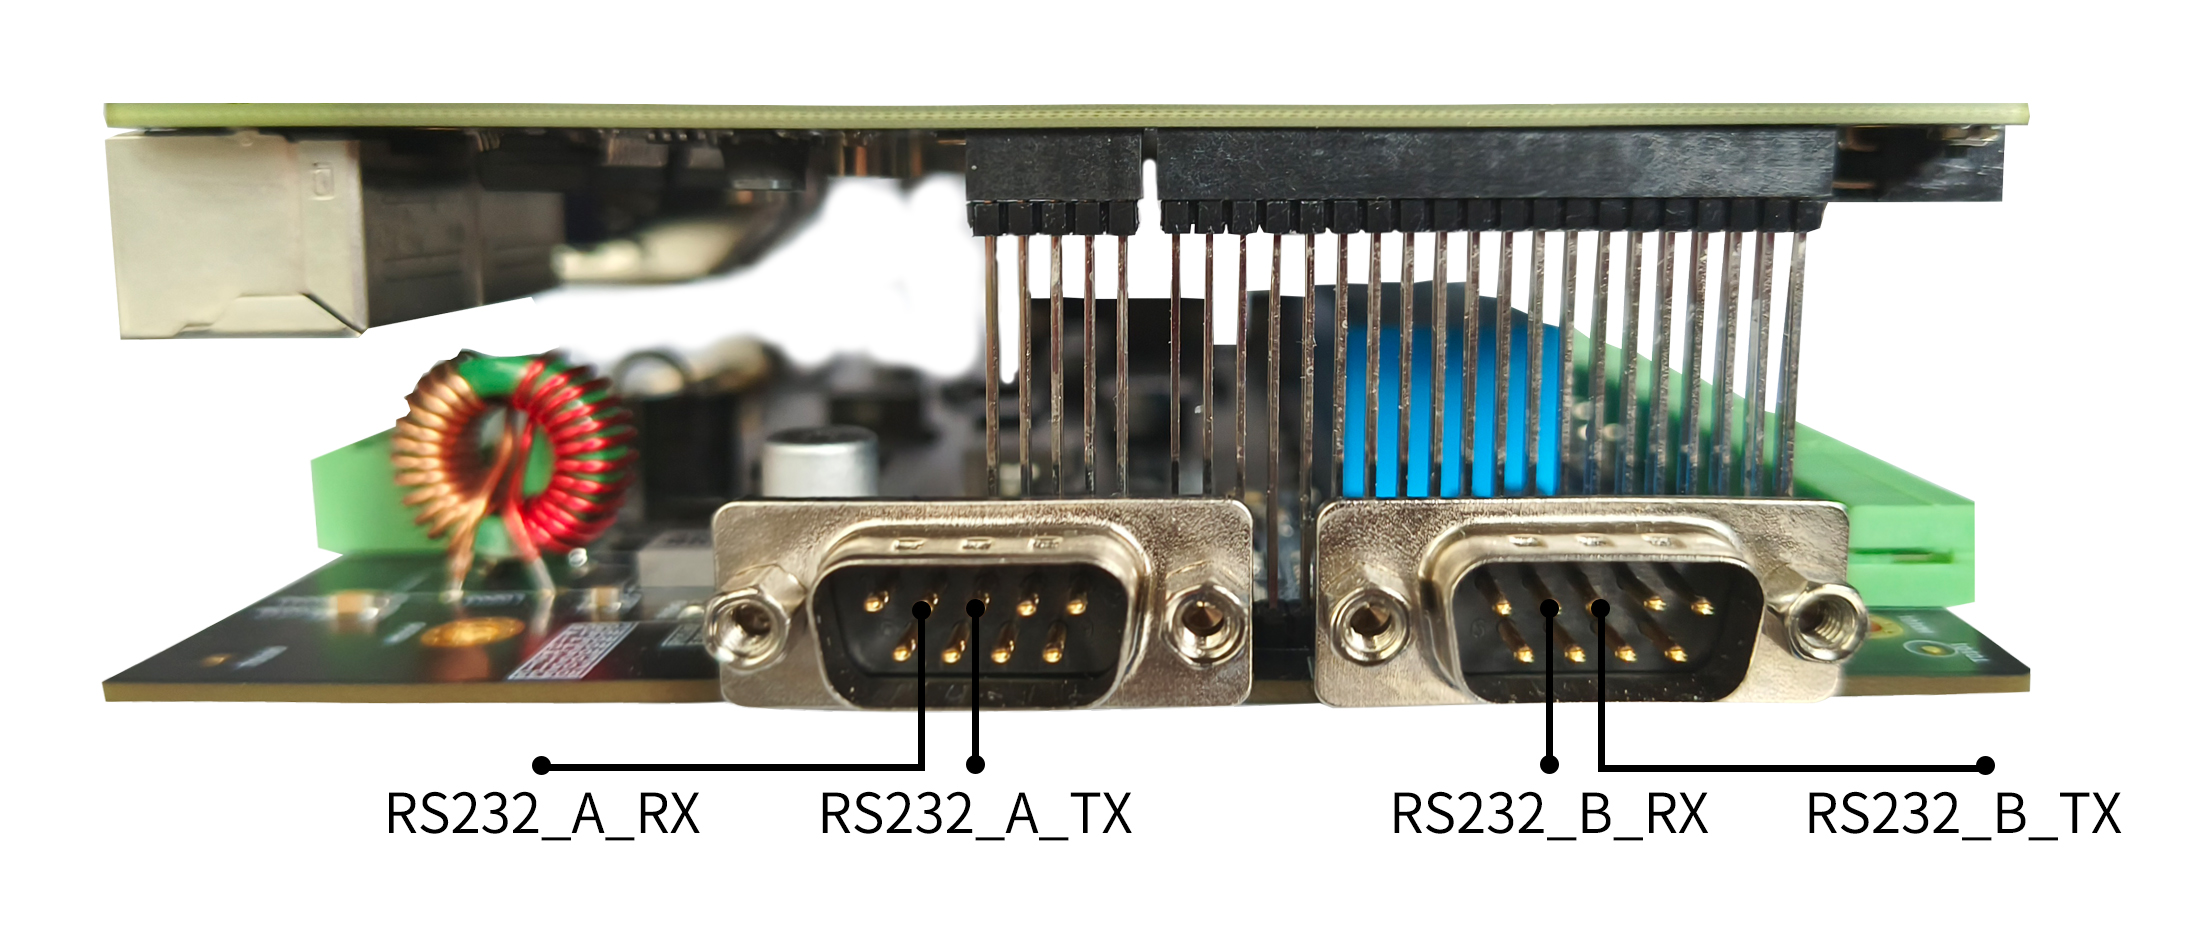
RS232x2 The RS232 interfaces on the development board are extended from the main controller’s uart4 and uart7, while RS485 is extended from uart9.
DTS Configuration
File path: kernel/arch/arm64/boot/dts/rockchip/rk3568.dtsi
@@ -3095,8 +3095,8 @@
                reg-io-width = <4>;
                dmas = <&dmac0 8>, <&dmac0 9>;
                pinctrl-names = "default";
-               pinctrl-0 = <&uart4m0_xfer>;
-               status = "disabled";
+               pinctrl-0 = <&uart4m1_xfer>;
+               status = "okay";
        };

        uart5: serial@fe690000 {
@@ -3137,8 +3137,8 @@
                reg-io-width = <4>;
                dmas = <&dmac0 14>, <&dmac0 15>;
                pinctrl-names = "default";
-               pinctrl-0 = <&uart7m0_xfer>;
-               status = "disabled";
+               pinctrl-0 = <&uart7m1_xfer>;
+               status = "okay";
        };

        uart8: serial@fe6c0000 {
@@ -3165,8 +3165,8 @@
                reg-io-width = <4>;
                dmas = <&dmac0 18>, <&dmac0 19>;
                pinctrl-names = "default";
-               pinctrl-0 = <&uart9m0_xfer>;
-               status = "disabled";
+               pinctrl-0 = <&uart9m1_xfer>;
+               status = "okay";
        };
After configuring the serial ports, the corresponding software nodes for the hardware interfaces are:
RS232:   /dev/ttysWK0、/dev/ttysWK1、/dev/ttysWK2、/dev/ttysWK3
RS485:   /dev/ttyS9
PIN Definitions
RS232
RS485
### Debugging Method

Users can use different host USB to serial port adapters to send and receive data to the development board's serial port according to different interfaces. For example, the debugging steps for RS485 are as follows:

(1) Connect the Hardware

Connect the A, B, and GND pins of the development board's RS485 to the A, B, and GND pins of the host serial port adapter (USB to 485 serial port module).

(2) Open the Host's Serial Terminal

Enter the command `sudo apt install ckermit` in the terminal to install kermit. After installation, open kermit, set the baud rate, and connect:

```shell
$ sudo kermit
C-Kermit> set line /dev/ttyUSB0
C-Kermit> set speed 9600
C-Kermit> set flow-control none
C-Kermit> connect
/dev/ttyUSB0is the device file for the host USB to serial port adapter. (3) Development Board Sends Data
The RS485 device file for the development board is /dev/ttyS0. Run the following command on the development board device:
echo "neardi RS485 test..." > /dev/ttyS9
The host’s serial terminal will receive the string “neardi RS485 test…” (4) Development Board Receives Data
First, run the following command on the development board device:
cat /dev/ttyS9
Then enter the string “Neardi RS485 test…” in the host’s serial terminal, and the device side will see the same string. (5) Host Exits Kermit Serial Connection
Press ctrl+\ followed by c to return to the terminal where you can enter exit.
C-Kermit>exit
OK to exit? ok